


I used to wonder if we are aware of microservices then why not a micro front end? I was not aware of this thing until the last couple of months when I got some related task related to it 😁. It was quite challenging because there is not much content/ article available related to it. So after one week of doing all my analysis, I found that I am a bit late in this field as you, but not anymore. Today in this story I will explain step by step how we can write micro frontend using angular. In the micro frontend app, there are a lot of things that are to be managed like routes, states, etc. But in this article, I will avoid writing all the cases since the motive of this article is to make you aware and help you in writing your first micro frontend end app. Please be patient in my next article I will write a full-fledged micro frontend which will include routing and state management.
Angular Elements
Angular elements are Angular components packaged as custom elements (also called Web Components), a web standard for defining new HTML elements in a framework-agnostic way.
Custom elements are a Web Platform feature currently supported by Chrome, Edge (Chromium-based), Firefox, Opera, and Safari, and available in other browsers through polyfills (see Browser Support). A custom element extends HTML by allowing you to define a tag whose content is created and controlled by JavaScript code. The browser maintains a CustomElementRegistry of defined custom elements, which maps an instantiable JavaScript class to an HTML tag.
Without wasting much time let's dive into code now 😬
Firstly, we have to create one angular project to become our micro front-end. So let’s start our project now.
ng new my-first-microfrontend-app
Once we are done with this step, we can write our app.
The Idea or Our App.
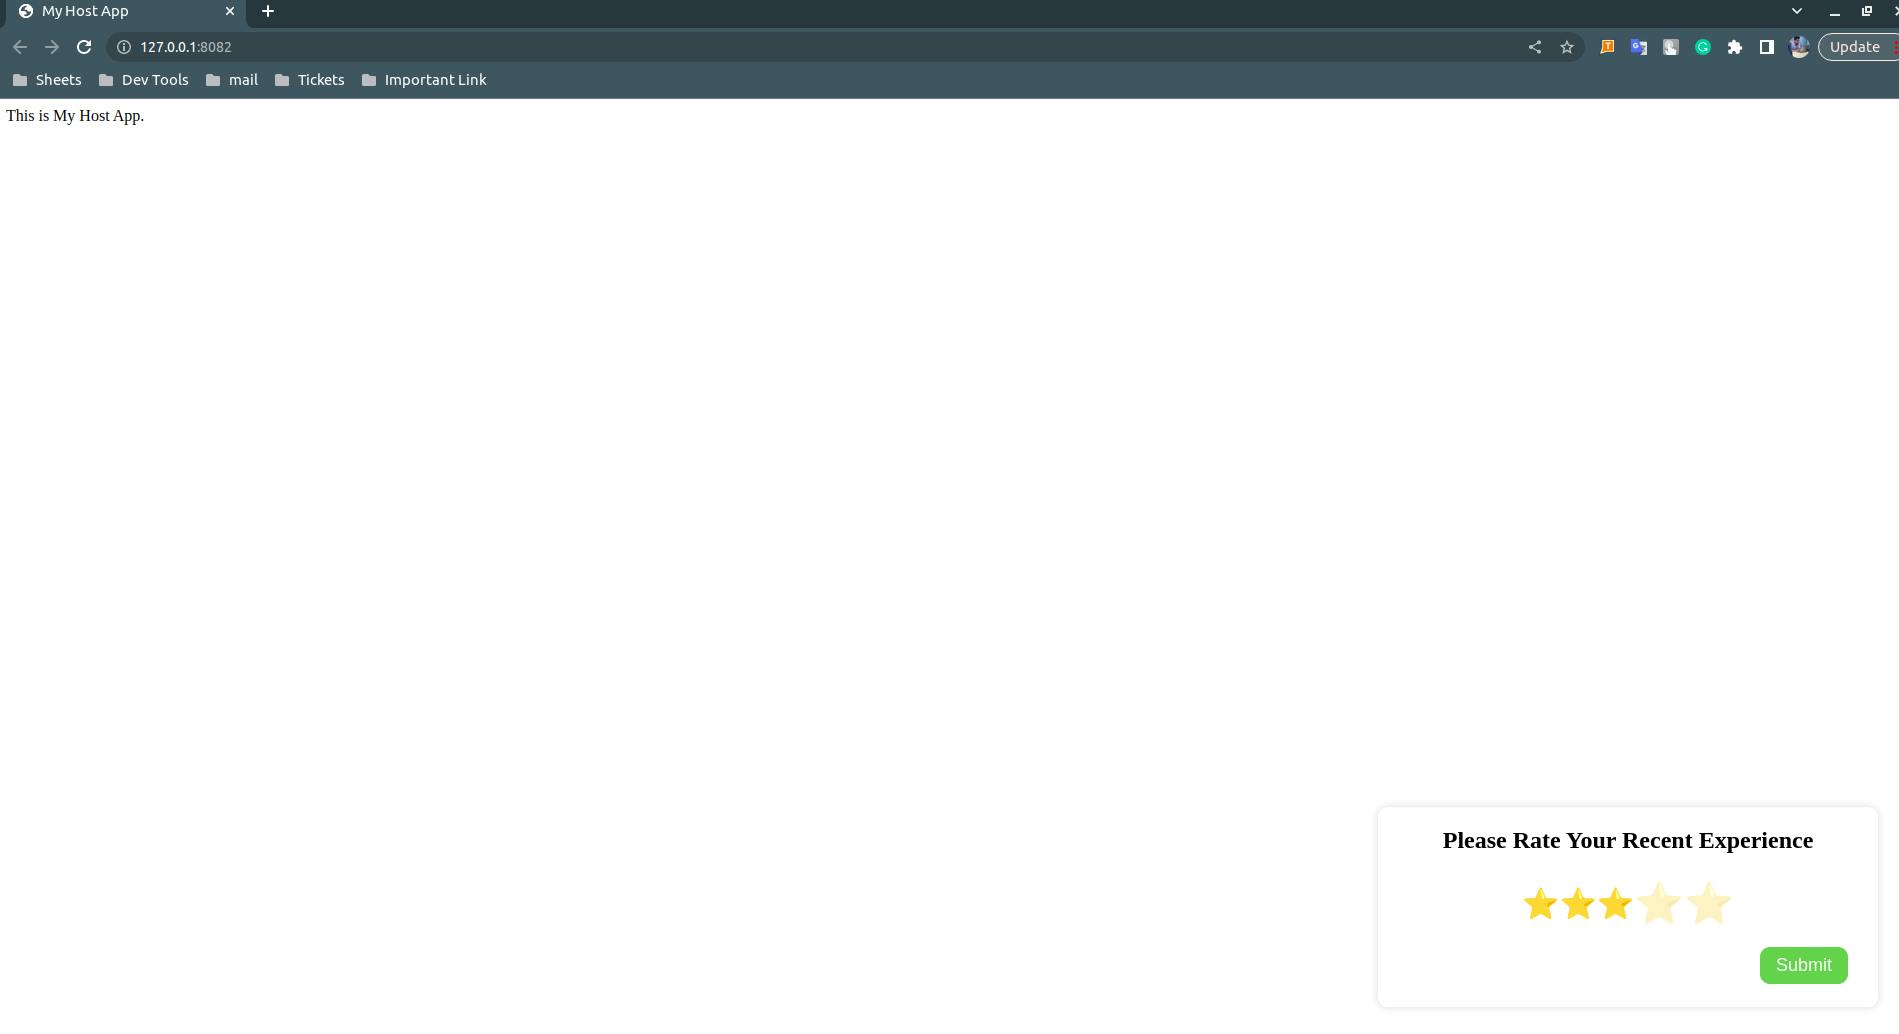
We will be writing one feedback app which can be used by any other host app for the feedback use case. They can use micro-front for sections of their website/app wherein they want some feedback from users. This feedback block you might have seen on some websites(like BookMyShow or the deliveries app) wherein they ask for feedback.
Let me show you what it looks like.

Looks easy and people can have some helpful stuff out of this project. I will be pushing my code to git and will share the link for the final code. Till now we have coded this to achieve the above UI.
So now we are mostly done with development, now is the tricky part where we have to build our micro front-end bundle that can be used by our host application. For this, we have to make some changes to the app.module.ts file.
Before moving forward you have to add the Angular elements package.
npm install @angular/elements --save
OR
ng add @angular/elements
for sure one of them will work.
Now the changes in app.module.ts file
Once you are done with the above changes run this command. Go to the index.html file. Here we have to use our micro-frontend.
like this…
But here comes the tricky part, You must be thinking what's the difference, it's just like running a normal angular app. So now I will explain how you can use this micro-frontend app in other applications which are different technologies like Vue, React, and Other Framework even in normal js projects.
I will explain in plain js project once you can use simple js mostly you will be able to use it in other frameworks(if not please do let me in the comments I will help you.)
Now we going to use it normal js project please focus
let's create one normal js file wherein we will use it.
But but but but 😅 I forgot one step. we have to create one bundle js which will have our micro-frontend. It is not going to be difficult I promise.
Step 1:
Run this command
ng build — output-hashing none
after successfully running you will find the dist folder at the root level.
Step 2:
Now in the dist folder, you can see there are three js files with the names main.js polyfills.js, and runtime.js. We have to copy the content of these files into one file which will become our bundle. To make you understand I did it manually, there are many npm packages that can do in one line of code.
Step 3:
let’s name this file mfe.js which will have all js the content of all the files.
Now we are good 😄.
Integration of Micro-frontend in normal js project
let's write our plain js project.
We are almost good now.
Last Step:
If you are using it plain js project you need to run your project on some server, we have to install http-server in your folder project. For other projects based on React, Vue, Angular, or any other technology you don't need this step because they are already running on some server.
To install HTTP server you need to run this command.
npm i http-server

That’s it.
Now you can run the server with the command in the folder where you have your host project or your normal js project.
http-server
and in the terminal whatever port it shows navigate to it.
for me, it looks like this.
Looks good right?
Now give yourself a thank you because you learned something new today.
That's it for today guys please do let me know if you have any queries regarding the above post I will try to reply as soon as possible.
Reach me out here
Twitter: twitter.com/iAmCyberster
LinkedIn: linkedin.com/in/ayushjack
Thank you for making it to the end here. 🙌